Integration Overview
Accept customers credit and debit cards in the GunBroker checkout, by integrating your Authorize.net gateway with GunBroker.
PDF Instructions
Integration Step-By-Step Guide
- Welcome Email
- Once approved for a high risk merchant account, you’ll receive a welcome email with your Authorize.net Login, API Login ID, and Transaction Key. Save this information.
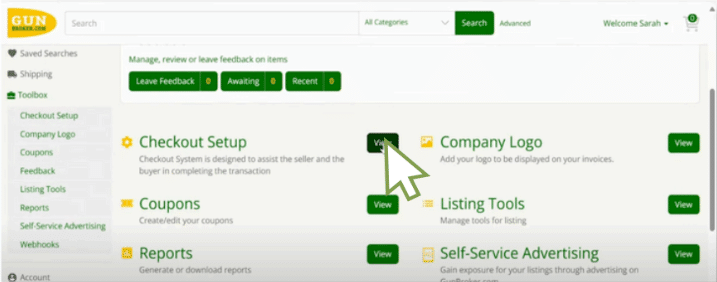
- Log In & Edit Checkout Setup
- Log in to your Gunbroker account.
- Click: Toolbox > Checkout Setup
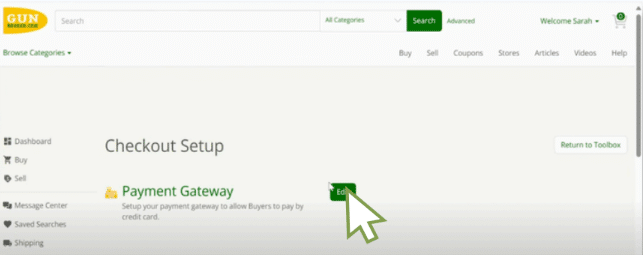
- Edit Payment Gateway
- Payment Gateway > Click Edit
- Payment Gateway > Click Edit
- Select Authorize.net
- In the Payment Gateway Dropdown: select “Authorize.net”
- In the Payment Gateway Dropdown: select “Authorize.net”
- Enter Authorize.net Info In Fields
- a. Transaction Type: In dropdown select “Authorization and Capture”
- b. Authorize.net API Login: Enter the login details from your welcome email
- c. Authorize.net Transaction Key: Enter the Key provided in your welcome email.
- d. Click Save All Changes button.
- You’re Done!
- Test your gateway to confirm everything is connected and processing correctly.


Need Help?
Contact Your AltruPay Customer Success Manager. 888-959-4205 • support@altrupay.com